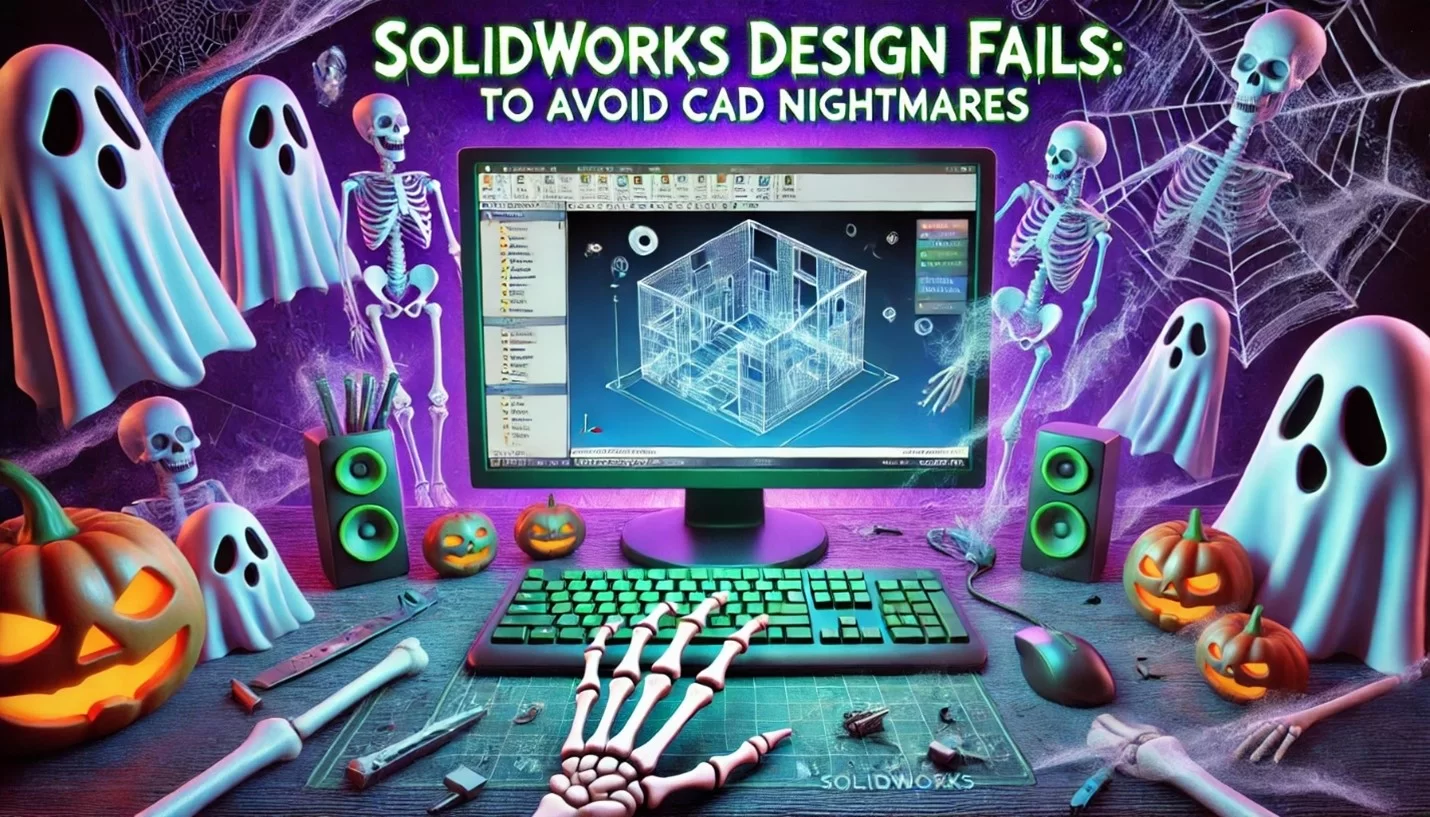
Spooky SOLIDWORKS Design Fails: How to Avoid CAD Nightmares

BLOG

Spooky SOLIDWORKS Design Fails: How to Avoid CAD Nightmares

Whether you’re a beginner just learning the ropes or an experienced CAD designer with years of projects under your belt, SOLIDWORKS design fails can strike unexpectedly and cause more than just frustration—they can derail timelines, increase costs, and even impact client trust. From disorganized file management to unexpected software crashes, the world of CAD is filled with potential pitfalls that can turn a straightforward project into an engineering nightmare.

In this blog, we’ll dive into some of the most common SOLIDWORKS design fails that haunt CAD workflows and explore practical ways to avoid these pitfalls.


SOLIDWORKS Design Fails to Watch Out For

For CAD beginners, navigating SOLIDWORKS can feel like walking through a haunted house. One wrong step, and you’re in trouble. Over-complicating sketches, misusing fillets, or misunderstanding constraints all cause frustrating errors. For example, adding too many constraints can make a sketch over-defined, leading to geometry errors and regeneration problems.

Avoiding Beginner Pitfalls: Start with simple sketches and gradually increase complexity. Avoid excessive constraints and verify each step as you build your design. When using features like fillets, apply them strategically to avoid performance issues while maintaining smooth geometry.


SOLIDWORKS and the Ghost of Overlooked Updates

Ignoring software updates is a common mistake that can come back to haunt CAD designers. Outdated software can lead to compatibility issues, errors, and missed opportunities for performance improvements. Over time, this can turn even simple tasks into a struggle.

Keep Your Software Current: Keep your SOLIDWORKS up-to-date and install updates promptly. Staying up to date will help you avoid compatibility problems, benefit from new features, and maintain optimal performance. Looking to update? Check out SOLIDWORKS 2025!


Common CAD Modeling Mistakes and How to Avoid Them

What are some common CAD modeling mistakes that haunt both beginners and experienced designers? One of the most frequent issues is creating overly detailed models. While it may seem beneficial to add intricate details, excessive features can slow down CAD software and lead to errors. For instance, intricate sketch features can result in longer regeneration times and problems with assemblies.

How to Avoid These Mistakes: Focus on creating simplified geometry and adding details only as needed. Keep sketches clean and organized, with fewer entities and constraints. Avoid adding redundant features that can complicate the model. Use the built-in CAD tools to check the quality of your model and resolve problems before they escalate.


Haunted Geometry: Why Complexity Can Be a Design Killer

In CAD systems, more geometry isn’t always better. Complex shapes and intricate details may look impressive, but they can cause significant issues, especially in large assemblies. For example, creating models with too many small features or tight tolerances can slow down system performance and lead to unexpected crashes.

Taming the Complexity: To avoid performance problems, simplify your model whenever possible. Break complex shapes into manageable features and avoid creating unnecessary small faces or edges. When dealing with assemblies, switch between simplified and detailed configurations as needed to balance performance and visual detail.


Are You Using Sketches Correctly?

Incorrectly constructed sketches are one of the common mistakes that can lead to SOLIDWORKS design fails. Overly complicated sketches with many entities and constraints can slow down performance and make modifications difficult. If a sketch is too complex, even small changes can result in significant errors.

Tips for Proper Sketching: Keep sketches simple and avoid unnecessary constraints. When making design changes, a clean, organized sketch will be easier to update. Use tools like “Check Sketch for Feature” to identify and correct potential issues before moving forward with your design.


Phantom Files: Disorganized File Management

Disorganized file management is one of the biggest headaches CAD designers have deal with. Phantom files—those lost or misplaced due to poor organization—can delay projects and disrupt the workflow. When file naming conventions aren’t followed, or folders are poorly structured, important files can go missing, just like a phantom that haunts your project. We’re all guilty of it, but naming files with vague terms like “final” or “final_v2” makes it hard to identify the correct version.

How to Avoid This Curse: Implement consistent file naming conventions and a logical folder structure from the beginning. Use SOLIDWORKS PDM (Product Data Management) to keep all files organized and easily accessible in a central repository. PDM can help track file versions, automate version control, and allow metadata searches to prevent phantom files from disrupting your workflow.


The Curse of Version Control: Disastrous Overwrites

When team members unknowingly work on different versions of the same file, it’s a recipe for disaster. Without a structured approach, conflicting updates or lost data can occur—turning a simple project into an engineering nightmare.

How to Avoid This Version Control Curse: Implement version control tools like SOLIDWORKS PDM and the 3DEXPERIENCE platform. They’ll allow you to track changes, maintain a complete version history, and merge updates seamlessly. Locking files while they are being edited prevents others from making conflicting changes, keeping everyone aligned and the workflow smooth.


SOLIDWORKS and the Mystery in the Machine

Software failures always happen at the most inconvenient times. Whether it’s a sudden crash, freeze, or unexpected glitch, these errors can result in lost work and frustration. The mystery lies in the unpredictability of these failures—sometimes a large assembly crashes due to low system memory, while other times, a rendering process fails without warning.

How to Mitigate These Risks: Ensure regular software updates and perform consistent backups. Enabling SOLIDWORKS’ auto-recovery feature can help recover work lost during a crash. Additionally, for large projects, consider breaking up assemblies into subassemblies to reduce system strain and optimize performance.


How to Fix a SOLIDWORKS Design Error For Beginners

Errors like geometry failures, broken references, or missing files can derail progress and cause serious delays. For instance, importing a third-party file may lead to misaligned faces or gaps in the geometry, resulting in annoying issues.

How to Avoid These Errors: Stay proactive by regularly checking for software updates and enabling auto-recovery options in SOLIDWORKS. Keeping backups of your work ensures you can revert to a previous state if an error occurs. Use tools like “Repair Sketch” or “Check Entity” to promptly identify and resolve geometry issues and avoid these problems.


Don’t Let Time-Consuming Design Changes Haunt You

In CAD design, one change can lead to a cascade of time-consuming modifications. Without a flexible design approach, adapting to new requirements can be difficult and costly. For example, rigid design practices can make client-requested changes disruptive and slow.

Plan for Flexibility: Use parametric modeling techniques to make your design easily adaptable. Organize your sketches and features well, anticipating future changes. By planning for flexibility, you can avoid wasting time on rework and keep spooky design problems at bay.


The Power of CAD Systems

CAD systems are powerful tools, but they can become overwhelming when not used correctly. Poor workflow practices can lead to inefficiencies and errors that haunt CAD designers.

Optimizing Your CAD Workflow: Plan your workflow carefully, choosing the appropriate tools for each design stage. Make the most of features like patterning and reference geometry to streamline the design process. The goal is to reduce the time spent on repetitive tasks while ensuring high-quality results.


A Final Word on Avoiding SOLIDWORKS Design Fails

Avoiding SOLIDWORKS design fails requires a proactive approach. Taking steps to optimize your workflow, manage files efficiently, and stay updated with the latest software versions will help keep engineering nightmares at bay. Remember, preparation and best practices are the keys to successful CAD design.

Want to explore more CAD tips, tricks, and techniques? Ready to take your SOLIDWORKS skill to the next level?

Browse through our library of SOLIDWORKS-based blogs, or sign up for your next Solidxperts Academy course. Check out our upcoming trainings, here.

X_green_halo

Any questions? Need help? Ask one of our experts.

Whether you’re ready to get started or just have a few more questions, you can contact us toll-free:
    Leveraging 3DEXPERIENCE for Sustainable Product Design

    BLOG

    Leveraging 3DEXPERIENCE for Sustainable Product Design

    [techtips_featured_image_shortcode]

    As the world grapples with climate change and resource depletion, there is a growing urgency to adopt sustainable practices. For businesses involved in product development, this means rethinking how products are designed, manufactured, and managed throughout their life cycle. Integrating sustainability into the core of product design is not only a response to consumer demand for eco-friendly products but also a strategic move to meet regulatory requirements and achieve long-term business success.


    The 3DEXPERIENCE platform stands out as a comprehensive solution that empowers you and your business to embrace sustainable innovation. With tools for lifecycle assessment, virtual twin simulations, and real-time data analysis you can easily optimize your products’ overall environmental impact. Make informed decisions about materials, production methods, and energy consumption to significantly reduce environmental footprints. This approach helps businesses align with sustainability goals, such as zero carbon targets and circular economy principles, while also unlocking opportunities for cost savings and improved brand reputation.

    Why Choose 3DEXPERIENCE for Sustainable Engineering?

    Leveraging the 3DEXPERIENCE for sustainable product design empowers you to integrate lifecycle assessment directly into the product development process. Monitor a product’s environmental footprint every step of the way, from raw material extraction to the end of its life cycle, by embedding sustainability goals directly into your design principles.

    a silhouetted engineer walking across a lush green field with a stream of digital information representing green technology

    Reducing the Environmental Impact of Products

    The platform helps identify the environmental impact of your designs early in the design process. By simulating various factors such as energy consumption, water use, and waste generation in a virtual space you can make better-informed decisions to minimize the carbon footprint and land use associated with manufacturing processes, paving the way for more sustainable production practices.


    Leveraging Virtual Twins

    Virtual twin technology is a powerful feature of the 3DEXPERIENCE platform that allows you to create digital replicas of your products. By using virtual twins, teams can test different materials and manufacturing methods, reducing the need for physical prototypes and limiting waste generation.

    Designing for a More Sustainable World: Key Practices

    a factory with a smokestack that releases leaves and clean water, symbolizing eco-friendly industrial innovation

    Your teams can make products more sustainable by carefully choosing materials and implementing smart practices throughout the product development cycle. Gain real-time insights into the environmental conservation aspects of different design choices from directly within your 3DEXPERIENCE platform. This enables your teams to optimize material use and adopt greener design practices.


    How Does Advanced Digitalization Support Sustainable Innovation?

    The platform’s advanced digitalization capabilities provide you with innovative solutions to assess and improve product sustainability. By leveraging real-time data, you can monitor the environmental impact of your designs and make adjustments to support zero carbon goals. Create new products while ensuring production processes align with broader sustainability goals.


    Circular Economy and Sustainable Product Development

    Adopting circular economy principles is essential for sustainable development. Leveraging the 3DEXPERIENCE for sustainable product design supports a circular economy by empowering your business to design products with recyclability in mind. By optimizing the use of materials and considering the product’s life cycle from start to finish, the platform encourages the creation of environmentally friendly products that can be easily disassembled and reused, reducing overall waste and raw material consumption.

    Enhancing Lifecycle Assessment with a Single Platform

    3DEXPERIENCE streamlines the lifecycle assessment process by providing all necessary tools on a single platform. Teams can evaluate the product’s life cycle in detail, considering factors like energy consumption, land use, and water use, ensuring the manufacturing processes contribute positively toward a more sustainable future.

    A laptop sitting on a simple table in the middle of a bright, lush green field displaying a teardrop shaped leaf design

    Supporting the Entire Product Lifecycle with Sustainable Practices

    From the initial design phase to the end of the product’s life, 3DEXPERIENCE helps businesses incorporate sustainable practices into every step. The platform supports waste reduction, smart material use, and optimized production processes, ensuring that the entire product lifecycle supports sustainability goals.


    Can 3DEXPERIENCE Facilitate the Production of Environmentally Friendly Products?

    Yes, 3DEXPERIENCE supports the development of environmentally friendly products. Its tools integrate sustainability throughout the entire value chain. Companies can simulate different aspects of a product’s environmental footprint, including energy consumption and waste generation. As a result, they can ensure that each product aligns with their sustainability goals.


    3DEXPERIENCE for a Greener Future

    Achieving sustainability requires more than intentions; it demands integrating eco-friendly practices into every step of product development. The 3DEXPERIENCE platform offers businesses the tools they need to design friendly products that meet sustainability goals, embrace circular economy principles, and reduce the environmental impact of production processes.


    By leveraging virtual twin technology, advanced digitalization, and real-time data, businesses can minimize waste and reduce energy consumption. They can also select more sustainable materials and optimize their manufacturing processes to support zero-carbon goals. This approach leads to more environmentally friendly products. It also delivers business benefits, including cost savings, an enhanced reputation, and improved regulatory compliance.

    Building a Greener Future Through Sustainable Engineering

    3DEXPERIENCE supports innovation by encouraging teams to consider waste reduction, sustainable materials use, and end-of-life management from the start. As companies strive for a greener future, the platform ensures sustainability becomes a core principle throughout the value chain.


    In a world where sustainability is a crucial differentiator, 3DEXPERIENCE offers a unified solution for responsible innovation. Adopting 3DEXPERIENCE for sustainable product design helps businesses create eco-friendly products and achieve their sustainability goals. It also paves the way for a future where environmental conservation is an integral part of product development.


    Want to know more? Want to get started on your sustainability journey? Reach out to our experts for advice on how to get started and to discover just how green the grass can be!

    X_green_halo

    Any questions? Need help? Ask one of our experts.

    Whether you’re ready to get started or just have a few more questions, you can contact us toll-free:
      How PDM Improves Collaboration for Remote Engineering Teams

      BLOG

      How PDM Improves Collaboration for Remote Engineering Teams

      [techtips_featured_image_shortcode]

      For an increasingly connected world, remote work is becoming the norm, especially in industries like engineering, where design and product development require input from experts across various locations. The shift to remote work presents challenges, particularly when it comes to maintaining clear communication, managing heavy design data, and ensuring consistency throughout your engineering process.

      With the increasing reliance on digital tools, companies need efficient solutions to keep everyone on the same page, regardless of where they’re working. SOLIDWORKS PDM provides a centralized hub where teams can securely store, access, and manage critical product data such as schematics, CAD models, and bills of materials (BOMs).

      By bridging the gap between remote engineering teams and offering secure access to product and design information, SOLIDWORKS PDM not only enhances collaboration but frees up your team to spend less time on management and more time on innovation and driving product development forward.


      What is Product Data Management (PDM)?

      Product Data Management (PDM) is a digital system that helps engineering teams organize and control their product data throughout the development process. For SOLIDWORKS PDM, this is your Vault. It acts as a centralized repository where team members can store, share, and track revisions of design files, schematics, and other crucial documents. Remote engineers can easily access the information they need, resulting in less time spent searching for files and more time on actual product development.

      For more information on What PDM is and why it’s important, check out our latest blog on the subject!


      How Does PDM Support Remote Engineering Teams?

      Successful remote engineering teams thrive on smooth and efficient collaboration. SOLIDWORKS PDM plays a critical role in making this possible for teams dispersed across different locations through user-friendly features and CAD-aware file sharing capabilities. For example:


      1. SOLIDWORKS PDM enables remote teams to collaborate seamlessly by centralizing all product data, including CAD models and documentation, in a secure vault. Through cloud or VPN access, engineers can retrieve and update files from anywhere, ensuring they always work with the latest versions.
      2. PDM’s version control tracks every change, preventing overwrites and ensuring clarity on who made edits and when. Automated revision management reduces errors and keeps projects on track.
      3. File sharing is simplified. Engineers can check files in and out, with controllable permissions ensuring secure access to sensitive data.
      4. Customizable workflows automate approvals and change requests, allowing global teams to maintain momentum without delays.
      5. Integration with SOLIDWORKS CAD and BOM management ensures consistency and efficiency across all product development stages.


      Remote engineering teams can retrieve, modify, and update files in real time, ensuring that everyone works with the most current version of the data, reducing the risk of errors or duplication. By leveraging these features, SOLIDWORKS PDM helps your teams stay connected to their product data, collaborate effectively, and maintain high levels of productivity, no matter where they are in the world.


      Can PDM Improve Communication for Remote Engineering Teams?

      Silhouettes of two engineers holding tablets that project a hologram of a gear, standing in front of a large, glowing blue globe.


      Absolutely. By integrating product data management with communication tools such as emails and messaging platforms, engineers and project managers can easily discuss design data and track changes in real-time. The use of software that combines CAD tools and data management solutions creates a collaborative environment, ensuring everyone is working from the latest versions of schematics and designs.


      How Does PDM Integrate with CAD Tools?

      SOLIDWORKS PDM is designed to work seamlessly within your familiar SOLIDWORKS CAD environment. By linking your CAD information directly to the product data management system, remote engineers can track revisions, update models, and share designs in real-time. This seamless connection ensures that all product development tasks are carried out using the most up-to-date data, reducing errors and improving overall efficiency.


      Handling Change Orders

      Tracking change orders is one of the most important aspects of any engineering process. SOLIDWORKS PDM provides transparency by ensuring all changes are documented and reviewed by the necessary stakeholders, regardless of location. This ensures that the latest version of any design is available for all team members, reducing confusion, and improving project workflows.


      Enhancing Collaboration with Schematics and BOM Management

      Handling complex projects involving detailed schematics and BOM can be a challenge for remote teams. PDM simplifies this by providing an organized platform where engineers can collaborate, track changes, and ensure that all information is accessible in one place. This leads to more efficient engineering processes and a smoother overall product development lifecycle.


      Startups and Growing Companies

      For startups and smaller companies, implementing a product data management system might seem like a significant investment. However, the ability to manage product data effectively from the outset can greatly improve scalability. As remote work becomes more common, PDM ensures that all team members can access necessary information, contributing to smoother project timelines and efficient workflows.


      A Solution for Global Collaboration

      For globally dispersed teams, effective data management is key. A well-implemented PDM system facilitates seamless collaboration between offices located in different parts of the world. By managing data centrally, remote engineers can work on shared projects without geographical limitations, leading to more efficient workflows and faster time-to-market.


      Best Practices for Remote Work in Engineering

      Remote engineers and project managers benefit from establishing best practices when working with PDM. Regularly reviewing change orders, organizing BOMs, and maintaining open lines of communication are essential for keeping projects on track. With PDM in place, these practices become easier to follow, ensuring consistency across the board.


      Why Choose Cloud-Based Solutions for Remote Engineers?


      A simple illustration of a cloud-based Product Data Management (PDM) system.


      Cloud-based solutions, like the 3DEXPERIENCE platform, have transformed how remote engineering teams collaborate. By hosting product data management on the cloud, teams no longer need to worry about local servers or hardware issues. Instead, they can access their designs from anywhere, as long as there’s an internet connection. This flexibility allows teams to stay productive even when working from different locations.


      What Role Does PLM Play in Remote Collaboration?

      PDM manages product data, while PLM oversees the entire product lifecycle. Integrated together, these solutions assist remote teams in managing design, logistics, manufacturing, and end-of-life processes for a holistic view of the product journey.


      Benefits of Combining Systems

      Taking this integration one step further, incorporating enterprise resource planning (ERP) with your PDM ensures better coordination between design and manufacturing. By linking the BOM from CAD with ERP systems, companies can better manage production schedules, raw materials, and delivery timelines. This is particularly helpful for remote teams, as it keeps all departments aligned with project milestones and progress.


      Streamlining Engineering Processes

      The use of PDM allows engineering teams to follow best practices for managing product development and engineering processes. By providing a structured way to manage design data, teams avoid duplicate files, conflicting versions, and communication breakdowns. This is essential when working remotely, as remote engineers need to rely on efficient data management to avoid costly mistakes.


      Final Thoughts on PDM for Remote Engineering Teams

      With a product data management system in place, remote engineers can easily collaborate across different regions and time zones, ensuring that everyone is working with the latest files and data. This creates a more streamlined workflow, where design revisions, change orders, and BOMs are managed in a single platform that all team members can access with an internet connection. Additionally, integrating PDM with other tools like CAD and PLM solutions further enhances this collaboration, providing an end-to-end solution for managing not only product data but also the broader aspects of the product lifecycle.

      For companies of all sizes—from established corporations to growing startups—implementing PDM can transform how projects are managed and executed, leading to more efficient engineering processes and faster time-to-market. Stay connected, collaborative, and productive, no matter where you and your team members are in the world.

      X_green_halo

      Any questions? Need help? Ask one of our experts.

      Whether you’re ready to get started or just have a few more questions, you can contact us toll-free:

        3DEXPERIENCE xApps: Enhancing Your SOLIDWORKS Workflow

        BLOG

        3DEXPERIENCE xApps: Enhancing Your SOLIDWORKS Workflow

        [techtips_featured_image_shortcode]

        3DEXPERIENCE xApps are cloud-based applications that extend SOLIDWORKS with browser-based design, simulation, and collaboration tools. They help engineers and designers complete projects faster, improve accuracy, and collaborate more effectively from anywhere. Whether you’re working on sheet metal design, molding, or simulation, these CAD apps are specifically tailored to help you tackle any specific task and they’re accessible right from your browser.


        Additionally, built on the 3DEXPERIENCE platform, these apps expand the functionality of SOLIDWORKS while providing truly browser-based CAD. Whether you’re managing geometry revisions, performing draft analyses, or designing complex enclosures and molds, these apps simplify everyday engineering tasks. They help improve efficiency, reduce errors, and keep teams aligned throughout the product development process.


        In this guide, we’ll explore how 3DEXPERIENCE xApps enhance your SOLIDWORKS workflow. We’ll also highlight their key benefits and share best practices for integrating these powerful tools into your daily design operations.

        Key Takeaways

        • xApps extend SOLIDWORKS with browser-based CAD tools.
        • They run on the 3DEXPERIENCE platform.
        • Designers can work from anywhere without installing CAD software.
        • xApps improve collaboration, revision management, and cloud data access.
        • Popular xApps include xDesign, xShape, xSheetMetal, xFrame, and xMold.

        What Are 3DEXPERIENCE xApps?

        The 3DEXPERIENCE platform xApps hero banner


        xApps are cloud-based CAD apps that provide you with enhanced sheet metal design, draft analysis, molding, and simulation capabilities. They integrate seamlessly with SOLIDWORKS and the 3DEXPERIENCE platform. Together, these roles and apps help engineers and designers complete specific tasks faster and more efficiently.


        xApps in the 3DEXPERIENCE platform provide a range of tools to meet various design needs. Below is a quick breakdown of each app and its core functionality:


        • xDesign: A flexible browser-based CAD tool that enables users to create, modify, and finalize designs. It’s ideal for concept development, detailed 3D modeling, and collaborative design workflows.
        • xShape: A powerful app focused on subdivision surface modeling. It allows users to create complex, organic shapes for products such as enclosures, consumer goods, and molds with ease.
        • xSheetMetal: Designed for sheet metal design, this app helps users create accurate sheet metal components with intuitive tools. It also preserves associative parametric sheet metal design, making updates faster and more consistent.
        • xFrame: A structural design app for creating welded and bolted frames. It streamlines frame modeling for manufacturing, machinery, and structural engineering projects.
        • xGenerative Design: An innovative generative design app powered by simulation and optimization algorithms. It automatically generates design concepts based on performance goals, functional requirements, and engineering constraints.
        • xMold: Designed for injection mold design, this app enables users to create and validate mold components. Integrated simulation features help identify potential issues before production begins.


        Together, these apps integrate seamlessly with SOLIDWORKS and the 3DEXPERIENCE platform, allowing users to streamline their workflows across various design stages. For a more detailed look at how to use apps on the platform, check out our previous blog!

        How Do 3DEXPERIENCE xApps Improve SOLIDWORKS Workflows?

        In practice, xApps provide CAD designers with tools to complete complex tasks, from sheet metal to molding and simulation. By integrating SOLIDWORKS with these apps, you gain access to advanced tools that simplify your workflows and increase productivity.


        What Is the Creator Role?

        For teams that need advanced design capabilities, the creator role provides essential tools like xDesign and xShape, which allow designers to create advanced models and sketches. With these apps, designers can manipulate subdivision surfaces and achieve more fluid, organic shapes for enclosures, molds, or sheet metal projects.


        Why Should You Use These Apps in Your Browser?

        Beyond their design capabilities, one of the standout features of 3DEXPERIENCE xApps is that they can be accessed directly from your browser. Whether you’re designing sheet metal parts or running simulation tests, you no longer need to install complex software locally. As a result, working in the cloud makes collaboration with other SOLIDWORKS users faster and more efficient.


        To get the most out of 3DEXPERIENCE xApps, it’s important to follow best practices to ensure efficiency. Whether it’s using the PDM system to manage revisions or employing xDesign for accurate geometry creation, following guidelines ensures you get the most out of the tools available.

        How Do You Get Started with 3DEXPERIENCE xApps?

        Once you’re familiar with the available apps, getting started with xApps is simple. This quick-start guide provides guidance for SOLIDWORKS users to begin integrating these apps into their daily workflows, ensuring you’re ready to tackle any specific task with ease.


        An engineer modifies the design of a mechanical part on a tablet displaying the 3DEXPERIENCE platform xApps.


        Using xApps for Molding and Simulation

        In addition to design, the 3DEXPERIENCE platform excels in simulation and molding applications. It offers powerful tools to test materials, designs, and manufacturing processes virtually before production begins. This allows for a more streamlined approach to manufacturing, reducing errors and saving costs.

        How Do xApps Work with PDM and PLM?

        Beyond design and simulation, xApps also support PLM capabilities, helping you manage product data throughout the lifecycle. This is especially useful for managing PDM and PLM systems, ensuring that all product information is up-to-date and easily accessible to all team members.


        How Can xApps Improve Your Sheetmetal and Mold Design?

        Similarly, for anyone working with sheet metal, the 3DEXPERIENCE platform brings improved sheet metal design capabilities. These apps offer precise control over sheet metal features such as bends, cuts, and folds, making them an essential tool for anyone dealing with enclosures or complex mold designs.


        How Do xApps Enhance Geometry Creation and Modification?

        Creating and modifying complex geometry is a critical aspect of the design process, and these apps offer intuitive tools to streamline this task. Whether you’re designing intricate sheet metal components or organic forms for molding, apps like xDesign and xShape provide users with flexible modeling options. These tools enable designers to manipulate geometry in real-time, making adjustments with ease and precision. With associative parametric design capabilities, any changes to the geometry automatically update across the model, reducing errors and saving time in revisions.


        Ultimately, by leveraging these geometry tools within your SOLIDWORKS workflow, you can accelerate the design process while maintaining full control over the intricacies of your project.

        Unlock the Full Potential of 3DEXPERIENCE xApps

        3DEXPERIENCE xApps extend SOLIDWORKS with browser-based CAD, cloud collaboration, simulation, and specialized engineering tools. These capabilities help teams design faster and collaborate more effectively.

        Whether you’re creating sheet metal components, structural frames, molds, or organic products, xApps provide the flexibility to work from virtually anywhere. They also keep your data connected through the 3DEXPERIENCE platform.

        Not sure which xApps are right for your team? Our certified specialists can help you evaluate your workflows, recommend the appropriate roles, and guide your implementation.

        X_green_halo

        Any questions? Need help? Ask one of our experts.

        Whether you’re ready to get started or just have a few more questions, you can contact us toll-free:

          16 Tips to Improve SOLIDWORKS Performance and Work More Efficiently

          BLOG

          16 Tips to Improve SOLIDWORKS Performance and Work More Efficiently

          [techtips_featured_image_shortcode]

          If you’re an advanced SOLIDWORKS user, you already know how robust the software is. However, there are underused features and hidden settings that can dramatically improve efficiency in SOLIDWORKS, boost performance, and streamline your workflow. Let’s dive into some tips and tricks that can help you take full advantage of what SOLIDWORKS offers.


          This guide explores powerful yet often overlooked SOLIDWORKS software features and settings that can help you work smarter and faster. From optimizing image quality to leveraging large assembly settings and adjusting simulation parameters, these insights will guide you toward faster performance and better design processes. Whether it’s fine-tuning your hardware choices or discovering the benefits of design review mode, each section offers actionable advice to help you boost your SOLIDWORKS performance.


          Now, let’s explore these expert-level tips and tricks in more detail.

          Enhancing Performance with the Right Settings

          One of the most effective ways to boost SOLIDWORKS performance is by adjusting assembly settings. When working with large assemblies, consider switching to Large Design Review Mode. This mode allows you to open assemblies with thousands of components without loading the full model data, significantly improving performance. It’s a best practice to use large design review mode when you need to make quick checks or edits to massive assemblies.


          Customize Default Settings

          In some cases, adjusting default settings can improve the CAD experience. For example, default file saving locations, templates, and units can be customized to save time during the design process. Setting these parameters to suit your workflow is a best practice that will save you clicks and improve efficiency over time.


          Optimize Image Quality Settings

          One overlooked setting that can impact overall performance is the image quality slider. By default, this setting may be set higher than necessary. Reducing image quality settings can help you achieve faster performance, especially when working with large assemblies. For the best results, find a balance between visual clarity and performance.


          Use Large Assembly Settings

          To further enhance overall performance, tweak your large assembly settings. This feature reduces memory usage and minimizes model data loading times. For example, disabling verification on rebuild can improve efficiency in design process, allowing you to focus more on creativity and less on waiting for the software to catch up.

          What Hardware Should You Use?

          Choosing the right hardware is critical for optimal performance in SOLIDWORKS. Ensure your workstation meets the system requirements for the latest version of SOLIDWORKS. Investing in a certified graphics card that supports SOLIDWORKS graphics compatibility can improve your experience, particularly when handling complex models.


          Best Practices for Graphics Compatibility

          Graphics performance can make or break your experience in SOLIDWORKS. For best performance, make sure you are using a graphics card certified by SOLIDWORKS. This ensures graphics compatibility, especially when working with large assemblies that demand high-quality rendering.

          Improve Workflows with Configurations and Design Review Mode

          If you frequently design variations of products, leveraging configurations can streamline your workflow. Configurations allow you to save multiple versions of a part or assembly within the same file. Pair this with design review mode to enable faster opening and reviewing of these configurations without compromising performance.

          Improve Efficiency in SOLIDWORKS with Better Simulation Settings

          For advanced users, tweaking the simulation settings to run quick validation tests can save time. This not only helps in optimizing your design process but also ensures that your models are CAD ready for manufacturing, reducing the risk of design errors.


          Simulation for Validation and Testing

          Don’t underestimate the power of simulation in SOLIDWORKS. Running simulations early in the design process can help validate your designs before they go into production, reducing costly errors. This good practice ensures that your models are not only functional but also meet the required specifications for strength, durability, and feasibility.


          Boost Simulation Speed by Adjusting Settings

          If you run simulations frequently, adjusting the simulation settings can speed up the process. For example, using draft quality mesh in the early stages of testing allows for quicker calculations without sacrificing the overall validity of the results. This simple trick can save hours when iterating through design changes.

          How Can You Improve Efficiency in SOLIDWORKS with New Components?

          Adding new components to assemblies can be time-consuming. Use the “Smart Components” feature to automate the process. By defining CAD features that are automatically added when a component is inserted into an assembly, you can significantly improve efficiency in SOLIDWORKS.

          Better CAD Organization with Your Feature Manager

          A cluttered Feature Manager can slow down even the best designers. Use folders to organize your features, sketches, and mates. This improves not only the visual appeal of your design but also makes it easier to locate and edit features when needed. Efficient use of the Feature Manager is a best practice in managing complex designs.

          Do You Need the Latest Version?

          Keeping your software up to date with the latest version of SOLIDWORKS ensures you’re using the most optimized tools for overall performance. Each new release typically includes performance enhancements, bug fixes, and new features designed to help you improve efficiency in SOLIDWORKS and work more efficiently.

          Streamline the Design Process with Verification Settings

          By turning off verification on rebuilds, you can speed up your design time. SOLIDWORKS’ default behavior is to check all parts and mates every time a rebuild occurs, but this can slow down your work. Disabling this feature is recommended when working on large models where constant verification isn’t necessary.

          Validation and Compatibility for Large Assemblies

          Validation is crucial when handling large assemblies. Use the built-in simulation tools to ensure that your designs meet performance criteria before moving into production. This is especially important for new components in assemblies where compatibility issues might arise.

          Workflow Optimization for Better Performance

          Finally, one of the simplest ways to improve efficiency is to evaluate your workflow. Organize your templates, utilize design review mode, and streamline the use of configurations to create a more efficient design environment. This not only enhances your CAD capabilities but also allows for quicker validation and verification of designs.

          Key Takeaways to Improve SOLIDWORKS Performance

          Incorporating these tips and tricks into your workflow can significantly improve efficiency in SOLIDWORKS, boosting your design speed and accuracy. By optimizing large assembly settings, adjusting image quality, and using Large Design Review Mode, you can achieve faster, more efficient performance. These changes help minimize lag and allow you to focus on innovation, not waiting for software to catch up.


          Leveraging advanced simulation settings ensures quicker validation of your designs, reducing errors and revisions. Keeping your software up to date with the latest version of SOLIDWORKS and using certified graphics hardware ensures compatibility and optimal performance when working on complex projects.


          By refining your design process with these best practices and underused software features, you’ll improve not only your workflow but also your ability to manage larger and more intricate projects. The result is greater productivity and better project outcomes, ensuring that your time and effort are spent where they matter most, creating innovative designs.


          Ultimately, small adjustments to your SOLIDWORKS setup can have a big impact on your overall performance, making your work faster, more efficient, and more enjoyable.


          Want to level up your skills even further? Check out our full course catalog to see what CAD skill you can master next! Or, reach out to our specialists for more info.

          X_green_halo

          Any questions? Need help? Ask one of our experts.

          Whether you’re ready to get started or just have a few more questions, you can contact us toll-free:
            Advanced Solutions: 3D Printing for Custom Automotive Parts

            BLOG

            Advanced Solutions: 3D Printing for Custom Automotive Parts

            [techtips_featured_image_shortcode]

            The automotive industry has seen a surge in customization demands as drivers seek personalized solutions for their vehicles. 3D printing for custom automotive parts has revolutionized how performance and aftermarket upgrades are created, offering new possibilities for car enthusiasts, mechanics, and small businesses alike.


            What Types of Parts Can You Print?

            The limit is your imagination! Print brake rotors or trailer hitches, or custom car parts like air vents and acceleration pedals. Plus, exterior accessories can be rapidly prototyped and adjusted just as easily. You can even print car body parts or specialized fixtures that cater to unique styles.


            Custom 3D Printed Car Parts & Prototypes

            Prototyping is faster and more cost-effective with 3D printing for custom automotive parts. The ability to quickly iterate designs for automotive applications, whether for exterior accessories or brake rotors, gives designers a competitive edge.


            Custom designed, carbon fiber GoPro mount attached to the dashboard of a Solidxperts Nissan 370z racecar.

            At Solidxperts, our printers help automotive businesses develop prototypes that precisely meet their specific needs.


            Nylon and ABS: Durability Meets Functionality

            The combination of nylon and ABS offers a strong, durable option for automotive applications. These materials are excellent for ducts and fixtures that need to withstand high heat or mechanical stress. Prints made from these materials are often indistinguishable from those that are traditionally manufactured, in terms of functionality.


            Can You Save on Production Costs?

            With 3D printing, a.k.a. additive manufacturing, production costs are significantly reduced. Traditional manufacturing methods require expensive molds and tooling, but FDM and fusion-based processes bypass these, allowing for fast prototyping and production. This benefit is particularly useful for small businesses offering aftermarket upgrades.


            How Does 3D Printing Improve Aftermarket Customization?

            3D printed car parts are a popular choice for creating custom exterior accessories, from car body pieces to brake rotors. Unlike traditional manufacturing methods, 3D printing offers flexibility and precision for these specific needs.


            Enhance Performance with Custom Accessories

            Additive manufacturing allows you to create custom car accessories tailored to your vehicle’s exact specifications. From flat surface panels to knobs and interior components, printed accessories ensure that you get the perfect fit and functionality for your aftermarket upgrades.


            Why is Nylon a Game-Changer in Automotive 3D Printing?

            Materials like nylon and carbon fiber have made a significant impact in automotive applications. These materials offer durable solutions for pieces that require strength, such as trailer hitches or knobs. Nylon is often paired with carbon fiber for even stronger automotive applications, increasing functionality and longevity.


            Nylon vs. TPU

            Choosing the right material can make all the difference in aftermarket upgrades. Nylon offers high strength, while TPU provides flexibility, ideal for custom pieces like knobs or exterior accessories. The versatility of these materials opens doors for pieces that perfectly match a vehicle’s performance requirements.


            Considering 3D Printing for Custom Automotive Parts?

            When it comes to 3D printing for custom automotive parts, precision and reliability are paramount. At Solidxperts, we provide FDM printers specifically designed for automotive applications, offering advanced features such as heated chambers and large build volumes. These features are crucial for producing strong, durable components like carbon fiber-reinforced nylon parts that meet the rigorous demands of the automotive industry.

            Whether you’re creating prototypes to fine-tune designs or manufacturing final products, Solidxperts’ 3D printing solutions ensure superior quality and functionality. Our printers excel at delivering high-performance parts, from exterior accessories and fixtures to critical performance parts, all while reducing production costs and allowing for rapid iteration.

            With Solidxperts’ advanced 3D printing technology, you can produce custom car parts that not only meet but exceed expectations.


            Do You Need a Heated Chamber?

            A heated chamber is crucial in maintaining consistent material temperatures during the printing process. This feature ensures that car body pieces, especially those requiring a smooth, flat surface, maintain quality throughout production.


            Durable, Custom Car Parts from Your Desktop

            Solidxperts offers desktop 3D printers capable of producing high-quality custom car pieces right from your workspace. Some of the printers in our lineup are designed to handle advanced materials like carbon fiber and ABS, making them perfect for manufacturing durable fixtures, nozzles, and more.


            Performance enhancing Nissan 370z custom designed air intake duct fitting on a Markforged desktop 3D printer.


            Precision and Functionality with Markforged

            Markforged industry-leading printers are designed to handle a wide range of materials, from carbon fiber and nylon to TPU and ABS, ensuring high strength and durability.

            You can produce car parts with reinforced carbon fiber filaments, delivering strength comparable to metal while significantly reducing weight—perfect for automotive applications where both strength and lightness are crucial. Whether you’re working on brake rotors, ducts, or structural performance parts, the precision of Markforged printers ensures accuracy down to the finest details.

            Additionally, Markforged’s heated chambers and cloud-based software, Eiger, optimize print performance and streamline the process, lowering production costs and shortening turnaround times.

            With these cutting-edge technologies, Solidxperts empowers clients to achieve remarkable results, making additive manufacturing a cost-effective and highly functional solution for any automotive customization project.

            Custom-fit carbon fiber air intake duct installed on a Nissan 370z.


            Conclusion

            3D printing has transformed the way we approach custom automotive parts, offering unmatched flexibility, speed, and precision in manufacturing. Whether you’re a small business looking to reduce production costs or a car enthusiast seeking unique aftermarket upgrades, 3D printing is the key to unlocking endless possibilities. From performance parts to interior accessories and fixtures, the ability to tailor each component to your vehicle’s specific needs is now more accessible than ever.

            With nylon, carbon fiber, TPU, and other advanced materials available, you can produce durable, high-quality prints that not only perform well but also last longer. For everything from prototypes to ducts to finishing with flat surfaces, Solidxperts’ range of 3D printers ensures precise and functional results for any automotive application. As the demand for customization grows, now is the perfect time to explore how 3D printing can revolutionize your approach to automotive manufacturing.

            X_green_halo

            Any questions? Need help? Ask one of our experts.

            Whether you’re ready to get started or just have a few more questions, you can contact us toll-free:
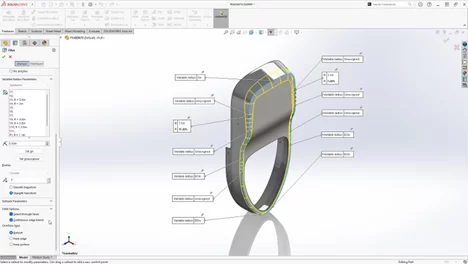
              How to Design Steel Stairs and Railings with SolidSteel Parametric

              BLOG

              How to Design Steel Stairs and Railings with SolidSteel Parametric

              [techtips_featured_image_shortcode]

              Stairs and railings are not just functional building elements but style statements, engineering marvels, and safety features. From grand hotel staircases to modern urban railings, they enhance aesthetics and usability. SolidSteel parametric solves the unique design and engineering challenges for these structures seamlessly in your familiar SOLIDWORKS environment.


              In this article, we’ll explore the intricate challenges of designing modern stairs and railings, the creative solutions available to engineers and designers, and how SolidSteel parametric provides the tools needed to bring these complex designs to life.

              The Dual Role of Stairs and Railings

              Modern stairs and railings serve a dual purpose. Aesthetically, they can define the character of a building, drawing the eye and creating a visual narrative that guides visitors through a space. Structurally, they must meet rigorous safety standards, support significant weight, and integrate seamlessly with the overall architecture. Achieving this balance between form and function requires both creative vision and technical expertise.

              Aesthetic Considerations

              Designing stairs and railings is an exercise in creativity. Architects and designers must consider materials, shapes, lines, and proportions to create elements that enhance the visual appeal of a space. Whether it’s a minimalist floating staircase or an ornate wrought-iron railing, the design must complement the building’s overall aesthetic.


              Structural Considerations

              On the engineering side, stairs and railings must adhere to strict safety codes and structural requirements. They need to be strong enough to support constant use, resistant to wear and tear, and capable of being manufactured with precision. This is where the challenges multiply, especially when dealing with complex geometries, custom designs, and varying materials.

              To know more about the broader toolkit of SolidSteel parametric, or to explore the difference b

              etween SolidSteel and SOLIDWORKS Weldments, check out our previous articles!

              Challenges in Designing Stairs and Railings

              • Complex Geometries: Modern architectural designs often feature non-linear or floating staircases that challenge traditional design methods. These geometries require precise calculations and intricate detailing to ensure both structural integrity and aesthetic beauty.
              • Material Choices: Steel is a popular material for modern stairs and railings due to its strength and versatility. However, classic steelwork requires specialized tools that can handle the unique properties of the material, including its weight, weldability, and resistance to corrosion.
              • Safety and Compliance: Engineers must ensure that every stair and railing system complies with local building codes and safety standards. This includes calculating load-bearing capacities, ensuring proper spacing between balusters, and designing handrails that are both sturdy and comfortable to use.
              • Customization Needs: No two projects are alike, and customization is often required to meet the specific needs of a building’s design. This means creating custom profiles, connections, and fittings that not only match the aesthetic vision but also meet structural requirements.

              SolidSteel parametric staircase design profile in SOLIDWORKS interface.

              How Does SolidSteel Parametric Solve These Challenges?

              • Advanced Stair and Railing Design Tools: Specialized tools for designing intricate staircases and railings streamline the creation of precise, customizable components with automated features that simplify stair and railing geometry intricacies. So, you can focus on creativity without the guesswork.
              • Custom Profile Creation and Management: Customization is key. SolidSteel parametric allows you to create and manage custom profiles, ensuring that every element of a stair or railing system can be tailored to the specific needs of a project. This flexibility is crucial when working on larger designs that require both standard parts and non-standard components or have unique aesthetic features.
              • Automated Connection Design: One of the most challenging aspects of designing stairs and railings is ensuring that all connections are secure, compliant, and easy to fabricate. SolidSteel parametric automates the connection design process, generating precise, detailed connections that meet structural requirements while maintaining the design’s aesthetic integrity.
              • Integration with SOLIDWORKS: Leverage your familiar SOLIDWORKS user interface while accessing advanced structural steel design tools, making the workflow more efficient and intuitive.
              • Detailed Production Drawings and Documentation: Generate detailed production shop drawings and documentation. This includes everything from cut lists to assembly instructions, ensuring that every component is fabricated and installed with precision.


              SolidSteel parametric software screenshot of a steel staircase.

              The Value of SolidSteel in Modern Stair and Railing Design

              Does SolidSteel Deliver Complex Designs Faster?

              Yes. Designing stairs and railings can be complex and time-consuming, but SolidSteel parametric simplifies the process. It automates profile creation, connection design, and structural analysis for steel connections in assemblies.


              Can SolidSteel Minimize Errors and Maximize Safety?

              Yes, again! SolidSteel parametric provides the right tools for error-free designs that meet safety standards. Real-time insights on load-bearing capacities and material strengths ensure precise calculations. Plus, automatic updates across your project minimizes errors, saving time and maintaining structural integrity.


              How Does SolidSteel Offer Innovation and Customization Freedom for Steel Design?

              SolidSteel parametric allows designers to create visually striking designs using custom metal profiles. This flexibility is ideal for high-end projects looking for unique elements. Innovate with things like cantilevered staircases and modern railings without traditional constraints, ensuring structural integrity while producing beautiful, distinctive systems that enhance any space.


              How Does SolidSteel Parametric Support Collaboration?

              Successful stair and railing design requires collaboration among architects, engineers, fabricators, and contractors. SolidSteel parametric, as a mechanical engineering CAD steelwork solution, integrates seamlessly with SOLIDWORKS, enabling unified teamwork. With a shared model, communication is streamlined, changes are swift, and errors are minimized.

              Did you know? Within the extended Klietsch software portfolio, the DSTV Assistant can quickly and easily generate your NC files. It integrates seamlessly with manufacturing machines through its NC data module, allowing for smooth communication in the DSTV format.


              DSTV Assistant window open and generating NC files for a steel staircase design in SOLIDWORKS.

              Why Use SolidSteel Parametric for Stair and Railing Design?

              SolidSteel parametric stands out as a comprehensive steel design solution, empowering engineers and designers to create complex and visually striking stair and railing systems.


              By simplifying the design of different connections, such as clip angle connections and end plates, SolidSteel ensures that all typical steel connections are secure and compliant. Bolt assistant streamlines the creation of complete bolt sets and cope cuts while supporting standard HV bolt sets.


              With tools like the assembly manager, professionals can efficiently manage entire assemblies, ensuring that connected beams and gusset plates are installed with precision. SolidSteel parametric’s intuitive default settings and its ability to handle both custom and standard boreholes make it an invaluable asset for any project.


              Whether you’re designing simple staircases or intricate modern railings, SolidSteel parametric offers the precision and flexibility needed to bring your vision to life while minimizing errors. Elevate your steelwork designs today by leveraging SolidSteel’s powerful tools for assembly management and customization.

              X_green_halo

              Any questions? Need help? Ask one of our experts.

              Whether you’re ready to get started or just have a few more questions, you can contact us toll-free:
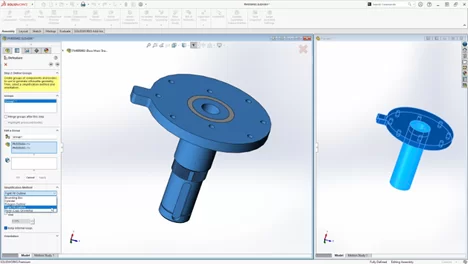
                SOLIDWORKS Start-Ups Program for Entrepreneurs

                BLOG

                SOLIDWORKS Start-Ups Program for Entrepreneurs

                [techtips_featured_image_shortcode]

                The journey from concept to product launch now-a-days is fraught with challenges, especially for startups and small businesses. With limited resources, tighter budgets, and the constant pressure to innovate, these companies often find themselves competing against industry giants with far greater financial and technological capabilities. However, thanks to advanced design and engineering tools like SOLIDWORKS, the playing field is becoming increasingly level. This powerful CAD (Computer-Aided Design) software is providing startups with the tools they need to innovate, iterate, and bring their products to market quickly and efficiently, effectively closing the gap between them and their larger competitors.

                The Startup Challenge: Innovation on a Budget

                Startups are known for their innovative ideas and the drive to disrupt established industries. However, turning a brilliant idea into a market-ready product requires more than just creativity—it demands precise engineering, detailed planning, and the ability to quickly adapt to feedback and changes in the market. Traditional methods of product development, which often involve expensive physical prototypes and time-consuming revisions, can be prohibitively costly for startups.


                This is where SOLIDWORKS comes into play. As a comprehensive suite of design, simulation, and manufacturing tools, SOLIDWORKS enables startups to virtually prototype their products, test various design iterations, and identify potential issues before they become costly problems. This digital-first approach not only saves time and money but also allows startups to iterate quickly, which is crucial in today’s rapidly changing market.


                Virtual Prototyping: Speeding Up the Iteration Process

                One of the most significant advantages of using SOLIDWORKS is the ability to create and test virtual prototypes. Unlike physical prototypes, which can be expensive and time-consuming to produce, virtual prototypes allow startups to explore multiple design options quickly and at a fraction of the cost. With SOLIDWORKS, startups can create highly detailed 3D models of their products, complete with complex geometries, materials, and mechanical components.


                Once a model is created, SOLIDWORKS offers a suite of simulation tools that can analyze the design’s performance under real-world conditions. For example, startups can test how a product will react to stress, heat, or fluid flow, enabling them to identify potential weaknesses or points of failure before any physical prototype is built. This level of analysis is particularly valuable for startups that operate in highly regulated industries, such as medical devices or aerospace, where product failure can have severe consequences.


                Moreover, SOLIDWORKS’ parametric design capabilities allow for easy modifications and iterations. If a design needs to be changed, whether due to new insights from simulation results or feedback from potential customers, adjustments can be made quickly without starting from scratch. This ability to iterate rapidly is a game-changer for startups, allowing them to refine their designs continuously and bring a polished, well-tested product to market faster than ever before.


                Collaboration and Communication: Bridging the Gap Between Teams

                Another challenge that startups often face is effective collaboration and communication, especially as teams become more distributed and projects involve multiple stakeholders, including engineers, designers, investors, and manufacturers. SOLIDWORKS addresses this challenge by providing a unified platform where all team members can access the latest design data, share insights, and collaborate in real time.


                The 3DEXPERIENCE platform takes this a step further by integrating cloud-based tools for project management, collaboration, and data sharing. Startups can manage their entire product development process from a single platform, ensuring that everyone involved is on the same page. This not only streamlines communication but also reduces the risk of errors and miscommunication, which can be costly for startups operating on tight budgets.


                For startups working with external partners, such as contract manufacturers or suppliers, SOLIDWORKS also offers tools for secure data sharing. Startups can share 3D models, drawings, and other design data with their partners while controlling who has access to what information. This level of control is particularly important for startups that need to protect their intellectual property while still collaborating effectively with external stakeholders.


                Cost-Effective Access to High-End Tools

                Historically, access to high-end CAD tools like SOLIDWORKS was limited to large companies with significant financial resources. However, in recent years, Dassault Systèmes, the company behind SOLIDWORKS, has made significant efforts to make the software more accessible to startups and small businesses.


                One of the ways they’ve done this is through the SOLIDWORKS for Startups program, which offers startups access to the full suite of SOLIDWORKS tools at a significantly reduced cost. This program is designed specifically for early-stage companies that are working on innovative products but may not have the budget to invest in expensive software licenses. By providing affordable access to industry-leading tools, SOLIDWORKS is empowering startups to compete on equal footing with larger, more established companies.


                In addition to affordable software licenses, SOLIDWORKS for Entrepreneurs also offers startups access to a global network of partners, mentors, and resources. This includes everything from technical support and training to marketing assistance and networking opportunities. For startups that are just starting, having access to this kind of support can be invaluable in navigating the complexities of product development and bringing a new product to market.

                Real-World Success Stories

                The impact of SOLIDWORKS on startups can be seen in countless success stories from around the world. One such example is Inmotive, a Canadian startup that developed an innovative two-speed transmission for electric vehicles. Using SOLIDWORKS, Inmotive was able to rapidly prototype and test their design, ultimately bringing their product to market faster and more efficiently than would have been possible using traditional methods.


                Another example is Square Robot, a robotics startup that specializes in developing autonomous robots for inspecting oil storage tanks. Using SOLIDWORKS, Square Robot was able to develop and refine their robot’s design efficiently. The software’s advanced simulation tools allowed them to test various design iterations virtually, ensuring that the robot could withstand the harsh conditions inside oil storage tanks.

                A Game-Changer for Startups

                In a world where innovation is key to survival, startups need every advantage they can get. SOLIDWORKS is providing these companies with the tools they need to design, test, and bring their products to market quickly and efficiently, leveling the playing field between them and their larger competitors. By offering affordable access to high-end tools, streamlining collaboration, and enabling rapid iteration through virtual prototyping, SOLIDWORKS is empowering startups to turn their ideas into reality and to do so with the confidence that they can compete with even the largest players in their industry.


                As the startup ecosystem continues to grow, and as more and more companies look to disrupt established industries with innovative products, SOLIDWORKS will undoubtedly remain at the forefront of this movement, helping to drive the next generation of entrepreneurs toward success.

                X_green_halo

                Any questions? Need help? Ask one of our experts.

                Whether you’re ready to get started or just have a few more questions, you can contact us toll-free:
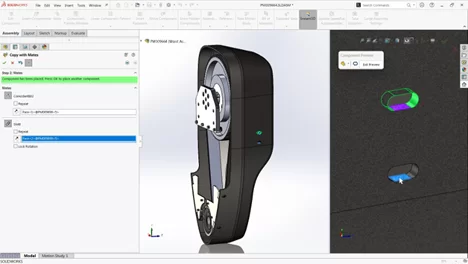
                  Unlocking the Power of SOLIDWORKS: Accessing and Managing Your SOLIDWORKS Add-ins

                  BLOG

                  Unlocking the Power of SOLIDWORKS: Accessing and Managing Your SOLIDWORKS Add-ins

                  [techtips_featured_image_shortcode]

                  SOLIDWORKS stands out as a versatile and powerful tool that empowers engineers, designers, and manufacturers to bring their ideas to life. While SOLIDWORKS is robust on its own, its true potential is unlocked using SOLIDWORKS add-ins. These specialized tools extend the software’s functionality, allowing users to tailor their experience to meet specific project needs.

                  In this blog, we’ll delve into the process of accessing and managing SOLIDWORKS add-ins and explore how these enhancements can transform your workflow.


                  What Are SOLIDWORKS Add-ins?

                  SOLIDWORKS add-ins are specialized modules that integrate directly into the SOLIDWORKS interface, providing additional features and capabilities that aren’t available in the core software. These add-ins can range from industry-specific tools, such as those used in sheet metal design or mold-making, to general productivity enhancers like SOLIDWORKS PDM (Product Data Management) or SOLIDWORKS Simulation. Whether you’re looking to automate repetitive tasks, improve design accuracy, or streamline collaboration, there’s likely a SOLIDWORKS add-in that fits the bill.


                  How to Access Your SOLIDWORKS Add-ins

                  Accessing SOLIDWORKS add-ins is a straightforward process that can be done directly from the SOLIDWORKS interface. Here’s a step-by-step guide:


                  1. Start by opening SOLIDWORKS.


                  1. Navigate to the top menu bar and click on the “Tools” tab. In the dropdown menu that appears, select “Add-Ins.” This will open the SOLIDWORKS Add-Ins dialog box.


                  1. In the SOLIDWORKS Add-Ins dialog box, you’ll see a list of available add-ins. These are divided into two sections: “Active Add-Ins” and “Start-Up.” The “Active Add-Ins” section shows the add-ins that are currently loaded, while the “Start-Up” section allows you to choose which add-ins should automatically load when SOLIDWORKS starts.


                  To activate an add-in, simply check the box next to its name in the “Active Add-Ins” section. If you want the add-in to load automatically every time you start SOLIDWORKS, check the box in the “Start-Up” section as well.

                  To even more quickly access your SOLIDWORKS Add-ins, use the Options flyout from the Menu bar. Click the small arrow beside the Options button to open the Add-Ins dialog. Here, you can activate Add-Ins for your current session or set them to automatically enable at startup. However, be cautious when enabling all Add-Ins at startup, especially if you’re on a shared network license, as it could consume higher-tier licenses unnecessarily.

                  Alternatively, you can enable or disable Add-Ins via the CommandManager by turning on the “SOLIDWORKS Add-Ins” tab. Right-click on any tab in the CommandManager and select this option to quickly manage your Add-Ins.

                  If you no longer need a specific add-in, you can easily deactivate it by unchecking the box next to its name in the “Active Add-Ins” section. This will remove the add-in’s features from the interface and free up system resources.


                  The Benefits of Using SOLIDWORKS Add-ins

                  • Enhanced Functionality: Add-ins provide features that go beyond the standard SOLIDWORKS toolkit. For example, the SOLIDWORKS Electrical add-in enables seamless integration of electrical and mechanical design, while SOLIDWORKS Composer simplifies the creation of technical documentation.


                  • Increased Efficiency: By automating repetitive tasks and providing specialized tools, add-ins can significantly reduce the time spent on routine design activities. For instance, the SOLIDWORKS Toolbox add-in offers a vast library of standard components, saving you the time of creating these from scratch.


                  • Improved Collaboration: Add-ins like SOLIDWORKS PDM streamline the management of design data, ensuring that team members are always working with the latest versions of files. This not only improves collaboration but also reduces the risk of errors.


                  • Customization: SOLIDWORKS add-ins allow you to tailor the software to your specific needs. Whether you’re working in aerospace, automotive, consumer products, or any other industry, there’s likely an add-in that can help you meet your unique requirements.


                  Popular SOLIDWORKS Add-ins to Consider

                  With a wide range of SOLIDWORKS add-ins available, choosing the right ones for your needs can be daunting. Here are some popular add-ins that are widely used across various industries:


                  • SOLIDWORKS Simulation: This powerful add-in allows you to run simulations directly within SOLIDWORKS, enabling you to test and validate your designs before they go into production. From static analysis to thermal and fluid dynamics, SOLIDWORKS Simulation offers a comprehensive set of tools for ensuring your designs are both functional and reliable.


                  • SOLIDWORKS PDM: Managing design data can be a challenge, especially in collaborative environments. SOLIDWORKS PDM (Product Data Management) helps you organize, manage, and track your design files, ensuring that everyone on your team is working with the most up-to-date information.


                  • SOLIDWORKS Electrical: Integrating electrical and mechanical design has never been easier with SOLIDWORKS Electrical. This add-in enables you to create electrical schematics and 3D models simultaneously, ensuring a seamless design process that reduces errors and improves efficiency.


                  • SOLIDWORKS Composer: If you need to create technical documentation, SOLIDWORKS Composer is an invaluable tool. This add-in allows you to generate high-quality, interactive content directly from your 3D models, streamlining the process of creating assembly instructions, user manuals, and other technical documents.


                  • SOLIDWORKS Visualize: For those who need to create photorealistic renderings of their designs, SOLIDWORKS Visualize is a must-have add-in. It provides a range of tools for creating stunning visuals that can be used for marketing, presentations, or internal reviews.


                  Best Practices for Managing SOLIDWORKS Add-ins

                  While SOLIDWORKS add-ins can greatly enhance your productivity, it’s important to manage them effectively to avoid potential issues. Here are some best practices:


                  • Load Only What You Need: While it’s tempting to activate multiple add-ins, doing so can consume system resources and slow down your computer. Only load the add-ins that you need for your current project.


                  • Regularly Review Active Add-ins: Periodically review your active add-ins to ensure you’re not running unnecessary tools. This will help keep your system running smoothly and reduce the chances of conflicts between add-ins.


                  • Keep Add-ins Updated: Add-in developers frequently release updates to improve performance, add new features, and fix bugs. Make sure to keep your add-ins updated to benefit from these improvements.


                  • Test Add-ins Before Using in Production: If you’re considering using a new add-in, it’s a good idea to test it in a non-production environment first. This will allow you to assess its functionality and compatibility with your existing setup before incorporating it into your workflow.


                  SOLIDWORKS add-ins are powerful tools that can significantly enhance your design capabilities, improve efficiency, and streamline collaboration. By understanding how to access and manage these add-ins, you can unlock the full potential of SOLIDWORKS and tailor the software to meet your specific needs. Whether you’re looking to run complex simulations, manage design data, or create stunning visuals, there’s a SOLIDWORKS add-in that can help you achieve your goals. Take the time to explore the wide range of add-ins available and experiment with different combinations to find the perfect setup for your projects.

                  X_green_halo

                  Any questions? Need help? Ask one of our experts.

                  Whether you’re ready to get started or just have a few more questions, you can contact us toll-free:
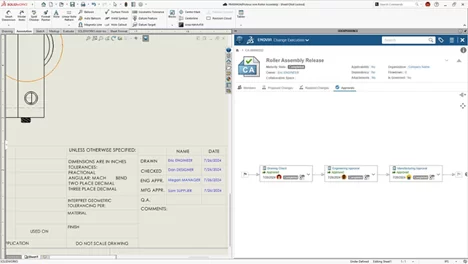
                    Streamlining Project Management: A Comprehensive Guide to Manage and Control on the 3DEXPERIENCE Platform

                    BLOG

                    Streamlining Project Management: A Comprehensive Guide to Manage and Control on the 3DEXPERIENCE Platform

                    [techtips_featured_image_shortcode]

                    Welcome to our in-depth tutorial on how to effectively leverage Manage and Control, the powerful project management and workflow tool within the 3DEXPERIENCE platform. Designed for teams navigating complex projects, Manage and Control ensures seamless task management, robust workflow automation, and precise access control, all within a unified environment. This guide will walk you through the steps to enhance efficiency, maintain control over your projects, and achieve consistent, high-quality results.


                    Table of Contents

                    • Introduction to Manage and Control
                    • Enabling Manage and Control
                    • Setting Up Your Workspace
                    • Managing Tasks and Workflows
                    • Controlling Access and Permissions
                    • Tracking Project Progress
                    • Use Cases


                    Introduction to Manage and Control

                    In today’s fast-paced engineering and design environments, managing projects efficiently is more critical than ever. Projects often involve multiple teams, departments, and stakeholders, each with their unique requirements and timelines. This complexity necessitates a tool that can not only organize and track tasks but also automate processes and ensure that all team members have the information they need, precisely when they need it.

                    Manage and Control on the 3DEXPERIENCE platform is the answer to these challenges. It provides a comprehensive set of tools that allow you to manage every aspect of your project, from assigning tasks and controlling access to tracking progress and automating workflows. This integration into a single platform streamlines communication and ensures that everyone involved in the project is aligned, reducing the risk of errors and delays.


                    Enabling Manage and Control

                    Before diving into the features of Manage and Control, it’s essential to ensure that your platform is set up correctly. The first step is to verify that your platform administrator has enabled the necessary permissions for managing tasks, workflows, and access controls. These settings are typically configured in the Platform Management dialog, where administrators can set up roles, permissions, and access levels for different users.

                    Once the appropriate permissions are in place, your team can fully utilize the Manage and Control features, from creating tasks to automating complex workflows. Ensuring these settings are correctly configured from the outset will save time and prevent potential access issues as your project progresses.


                    Setting Up Your Workspace

                    The foundation of effective project management lies in a well-organized workspace. On the 3DEXPERIENCE platform, setting up your workspace involves defining your project structure, which includes creating folders, tasks, and subtasks, as well as assigning roles and responsibilities.


                    Defining Your Project Structure

                    Start by outlining the main goals of your project and breaking them down into manageable components. This often involves creating a hierarchical structure where larger tasks are divided into smaller, more specific subtasks. Each task should have a clear objective and be assigned to a team member responsible for its completion.

                    For example, if you’re managing a product development project, you might have high-level tasks such as “Design Phase,” “Prototyping,” and “Testing.” Each of these tasks can be further divided into subtasks like “CAD Modeling,” “Material Selection,” “3D Printing,” and “User Testing.” This breakdown helps ensure that no part of the project is overlooked and that all team members know their specific responsibilities.


                    Assigning Roles and Responsibilities

                    Once your tasks are defined, assign them to the appropriate team members. The 3DEXPERIENCE platform allows you to assign roles that reflect the actual responsibilities of each team member, such as “Designer,” “Project Manager,” “Engineer,” or “Quality Assurance.” Assigning these roles helps to clarify expectations and ensures that each team member knows who to contact for specific issues or approvals.

                    In addition to individual task assignments, consider setting up teams or groups for larger projects. This grouping allows for more efficient management of tasks and communication, as team members can easily collaborate within their assigned group while still having visibility into the broader project.


                    Managing Tasks and Workflows

                    With your workspace set up, you can begin managing tasks and automating workflows. Effective task management and workflow automation are at the heart of the Manage and Control feature, allowing you to keep your project on track and ensure that all tasks are completed in a timely manner.


                    Task Management

                    Task management on the 3DEXPERIENCE platform is straightforward yet powerful. After creating tasks and subtasks, you can assign due dates, set priorities, and add detailed descriptions or attachments. The platform also allows you to link tasks together, creating dependencies that ensure tasks are completed in the correct order. For example, the “User Testing” task cannot begin until the “Prototyping” task is complete. This logical linking of tasks helps prevent bottlenecks and ensures that your project progresses smoothly.

                    As tasks are completed, team members can update their status, allowing project managers to track progress in real-time. The platform’s intuitive interface makes it easy to see which tasks are on schedule, which are delayed, and which have been completed, providing you with a clear overview of your project at all times.


                    Workflow Automation

                    Workflow automation is one of the most powerful features of Manage and Control. By setting up automated workflows, you can streamline repetitive tasks, ensure that approvals are obtained promptly, and reduce the risk of human error.

                    For example, you can create a workflow that automatically routes a completed CAD model to the quality assurance team for review, and then to the project manager for final approval. If any issues are found during the quality assurance review, the workflow can automatically send the model back to the designer with detailed feedback, ensuring that revisions are made before the project can move forward.

                    These automated workflows can be customized to fit the unique needs of your project, whether it’s a simple approval process or a complex series of interdependent tasks. By automating these processes, you free up your team to focus on more critical tasks, improving overall efficiency and reducing the time it takes to complete your project.


                    Controlling Access and Permissions

                    In any project, controlling access to information is crucial. The 3DEXPERIENCE platform provides robust access control features that allow you to manage who can view, edit, or approve documents and tasks.


                    Defining Access Levels

                    Access control on the 3DEXPERIENCE platform is highly customizable. You can define access levels for individual users or groups, specifying who can view, edit, or approve each task or document. For example, you might allow designers to edit CAD models but restrict them from approving final designs, a role reserved for the project manager.

                    These access controls help ensure that only authorized team members can make changes to critical documents, reducing the risk of unauthorized edits or accidental deletions. It also simplifies the approval process, as only those with the appropriate permissions can approve or reject tasks.


                    Regularly Reviewing Permissions

                    As your project evolves, so too might the roles and responsibilities of your team members. It’s essential to regularly review and update access permissions to reflect any changes in team structure or project scope. This ongoing review ensures that access to critical information is always limited to those who need it, helping to maintain the security and integrity of your project.


                    Tracking Project Progress

                    One of the key benefits of using Manage and Control is the ability to track your project’s progress in real-time. The 3DEXPERIENCE platform provides several tools that allow you to monitor task completion, identify potential bottlenecks, and ensure that your project stays on schedule.


                    Visualizing Progress

                    The platform offers multiple ways to visualize your project’s progress, including Gantt charts, Kanban boards, and project dashboards. These tools provide an at-a-glance view of where your project stands, highlighting completed tasks, tasks in progress, and any that are overdue.

                    Gantt charts are particularly useful for complex projects, as they allow you to see the dependencies between tasks and how delays in one area might impact the overall project timeline. Kanban boards, on the other hand, provide a more straightforward, task-based view, making it easy to see what tasks are currently being worked on and what’s up next.


                    Generating Reports

                    In addition to visual tools, the 3DEXPERIENCE platform allows you to generate detailed reports on various aspects of your project. These reports can include information on task completion rates, project milestones, resource allocation, and more. Regularly reviewing these reports can help you identify trends, spot potential issues before they become problems, and make informed decisions about how to proceed with your project.


                    Use Cases

                    Manage and Control on the 3DEXPERIENCE platform is versatile enough to be used in various industries and project types. Here are a few examples of how different teams can benefit from this powerful tool:


                    • Complex Project Management: For large, multi-team projects, Manage and Control ensures that all tasks are clearly defined, assigned, and tracked. This capability is particularly valuable in industries like aerospace, automotive, and industrial design, where projects often involve numerous stakeholders and tight deadlines.


                    • Compliance Management: In regulated industries such as pharmaceuticals or construction, managing compliance-related tasks is critical. Manage and Control allows you to set up workflows that ensure all necessary steps are completed, documented, and approved, helping you stay compliant with industry regulations.


                    • Collaboration Across Teams: Whether your teams are located in different offices or working remotely, Manage and Control facilitates seamless collaboration. All team members can access the same tasks, updates, and documents, ensuring that everyone stays on the same page, regardless of their location.


                    Conclusion

                    Manage and Control is an indispensable tool for any team looking to streamline project management, automate workflows, and maintain control over their projects. By using this powerful feature within the 3DEXPERIENCE platform, you can ensure that your projects are completed on time, within budget, and to the highest quality standards.

                    If you have any questions or need assistance getting started with Manage and Control, don’t hesitate to reach out to us. Our Xperts are here to help you make the most of this powerful tool for your project management needs.


                    Discover more about Manage & Control on the 3DEXPERIENCE!


                    Compete your 3DEXPERIENCE knowledge. Read through our blogs on Share and Markup, and Store and Revise.

                    X_green_halo

                    Any questions? Need help? Ask one of our experts.

                    Whether you’re ready to get started or just have a few more questions, you can contact us toll-free:
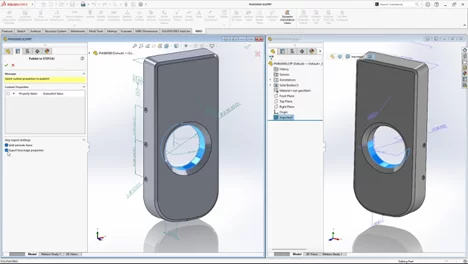
                        Download

                          Download

                            Download