More and more organizations are moving to the 3DEXPERIENCE platform to streamline collaboration, improve data management, and connect their teams. One of the most important pieces of a successful rollout is understanding how Roles work, how they’re assigned, and how licensing is managed.
In this article, we’ll walk through the full lifecycle of Role management, from inviting members to your tenant to assigning Roles individually or by group.
Platform Administrator Access
The steps outlined below require you to be a 3DEXPERIENCE Platform Administrator for your company tenant.
If you don’t see the Platform Management or Members Management dashboards:
-
Reach out to your internal 3DEXPERIENCE administrator, or
-
If you are the admin and still can’t access them, contact your technical support team to help resolve the issue.
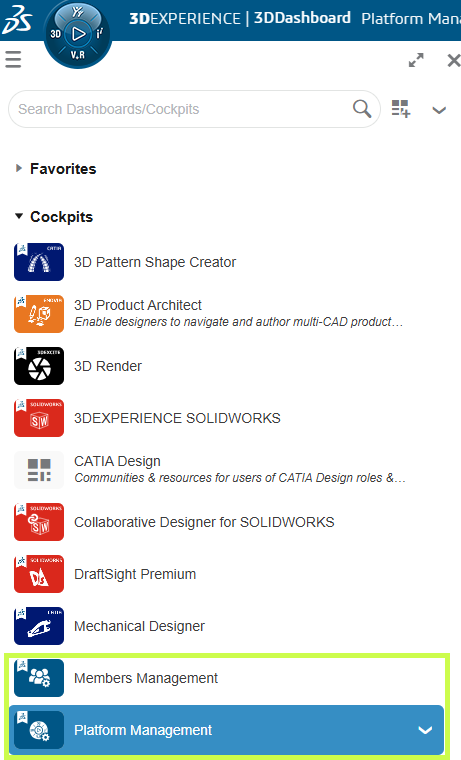
Members Control Center
Once you have the appropriate permissions, open the Members Control Center from:
-
The Members Management Dashboard, or
-
The Members tab within the Platform Management Dashboard
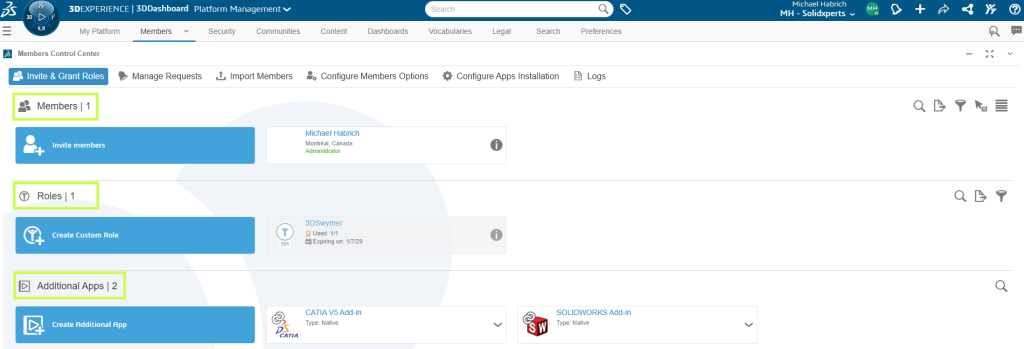
This is your main workspace for:
-
Reviewing existing members
-
Viewing available Roles and license counts
-
Managing additional apps assigned to the tenant
Licensing Options (Before You Assign Roles)
Before assigning any Roles, it’s a good idea to review the licensing behavior for your tenant.
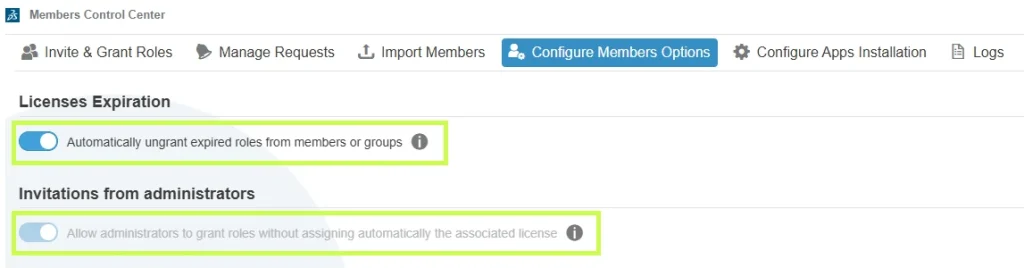
From the Members Control Center, select Configure Members Options.
There are two key settings to review:
1. License Expiration
We strongly recommend enabling Automatically ungrant expired roles from members or groups.
This ensures that:
-
Roles are automatically removed when licenses expire
-
Users don’t encounter access errors due to expired licensing
2. Invitations from Administrators
The option Allow administrators to grant roles without assigning automatically the associated license controls how external users access Roles:
-
Enabled: external users can use their own licenses
-
Disabled: licenses must come from your tenant
Taking a moment to configure these options upfront can prevent licensing issues down the road.
Understanding Member Role Assignments
To see how these settings affect a specific user:
1. Go back to Invite & Grant Roles
2. Select Details for a member
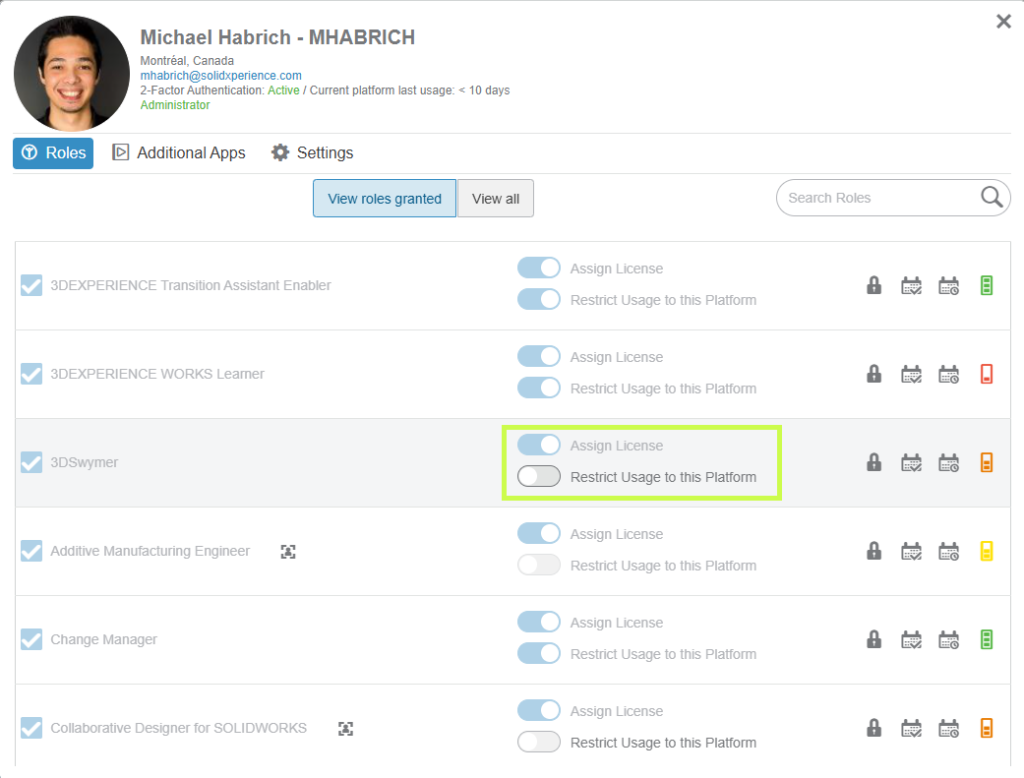
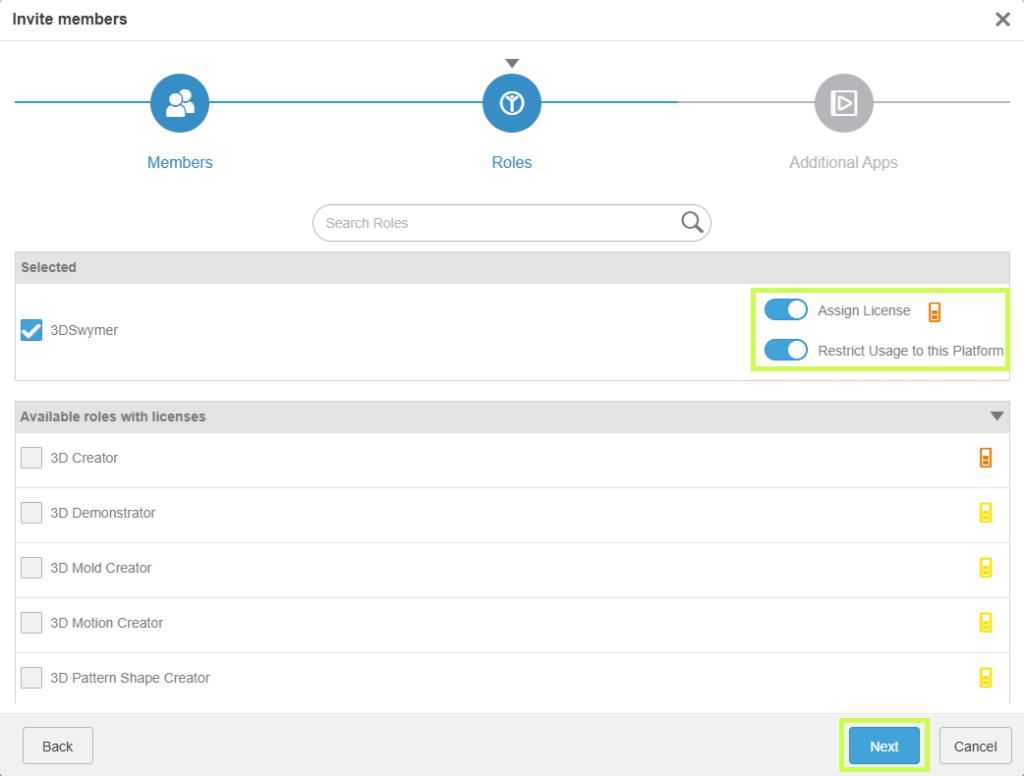
Each Role represents a purchased license and unlocks access to specific apps and capabilities.
Key options include:
Assign License:
- Enabled → license is consumed from your tenant
- Disabled → external user uses a license from another tenant
Restrict Usage to the Platform:
- Enabled → license can only be used on this tenant
- Disabled → license can be used across tenants
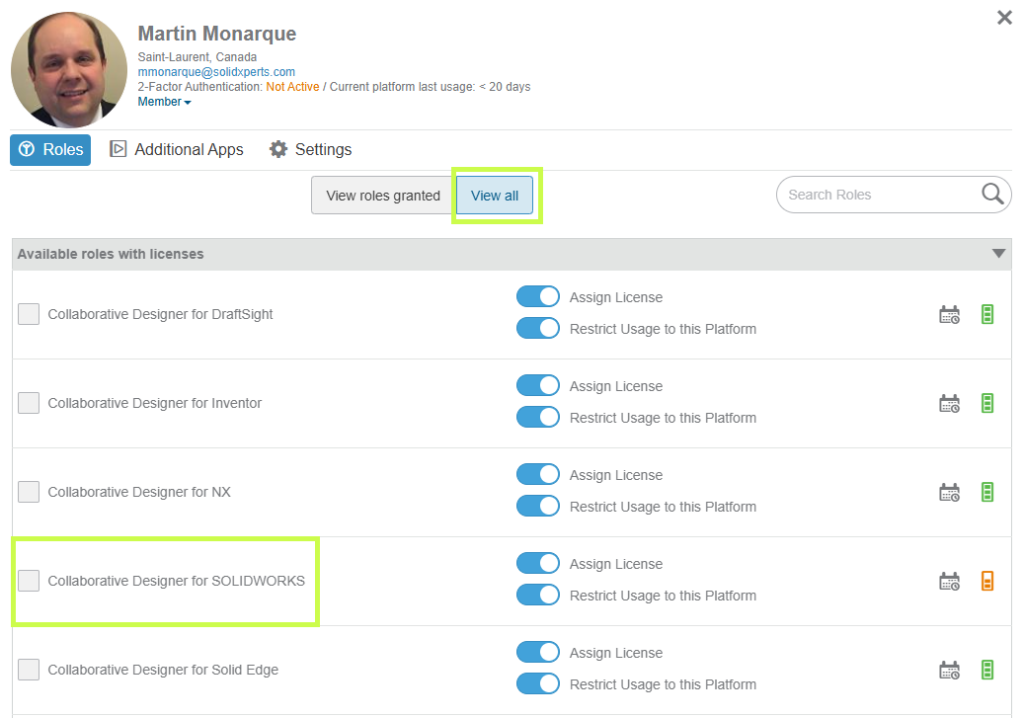
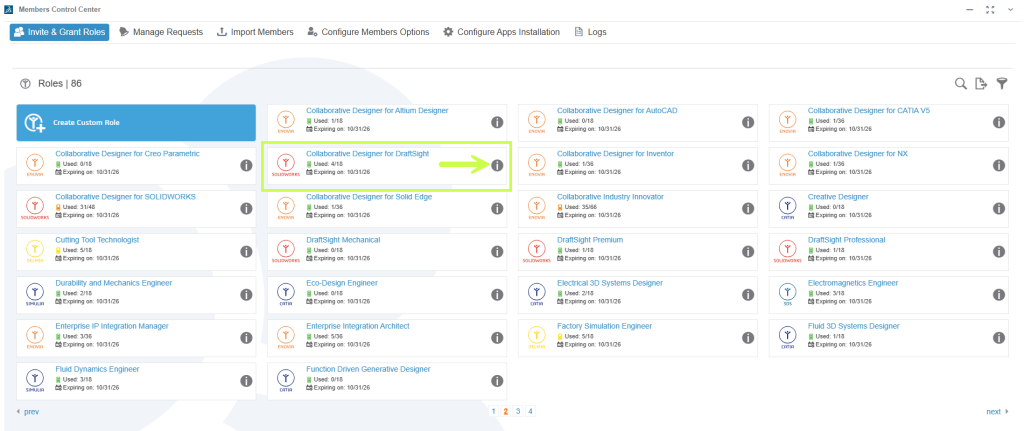
Assigning Roles to Members
To assign Roles:
1. Click View All to see every available Role
2. Use search if needed, by Role name or trigram (for example, UES for Collaborative Designer for SOLIDWORKS)
3. Set the licensing options for the Role
4. Select the checkbox to grant it
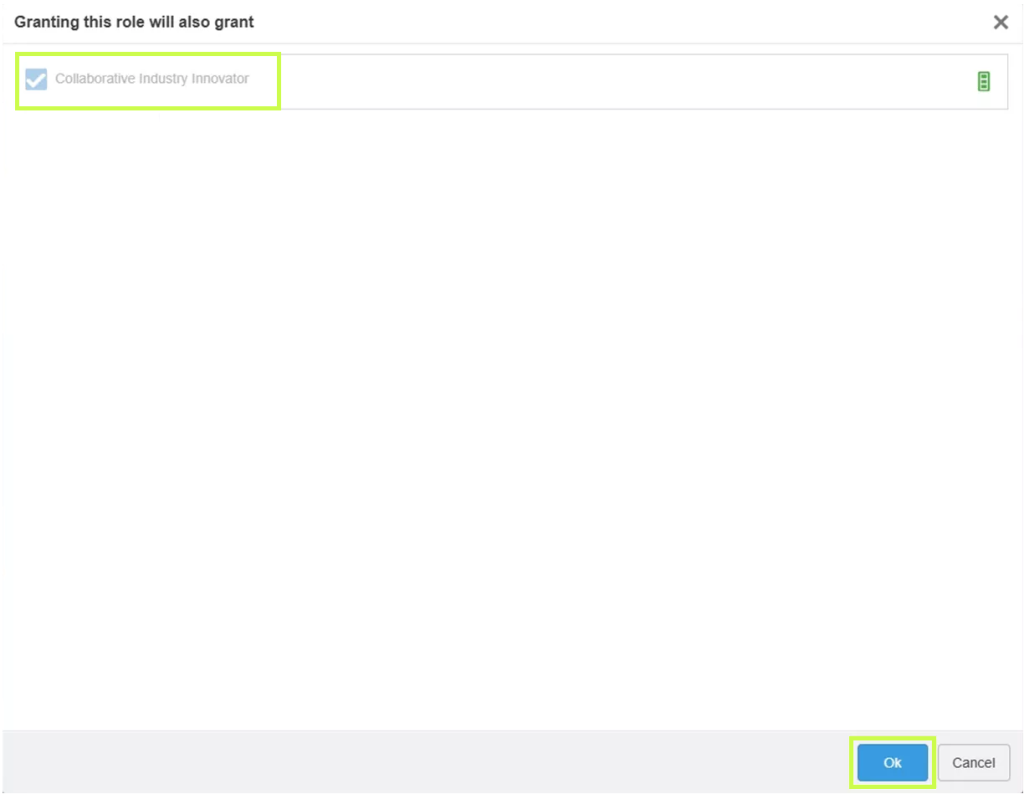
If a Role requires prerequisites, you’ll be prompted to add them automatically. Simply confirm to proceed.
Inviting New Members
Roles can also be assigned during the invitation process. You can invite users from:
-
My Platform Control Center
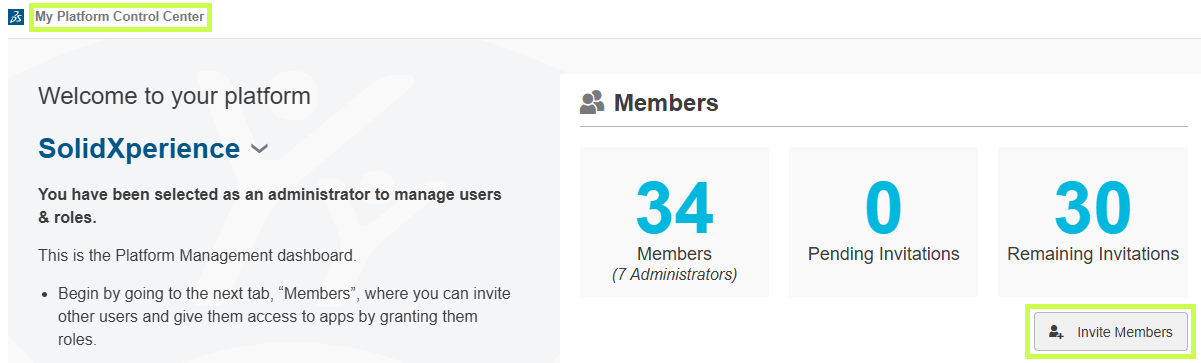
-
Members Control Center
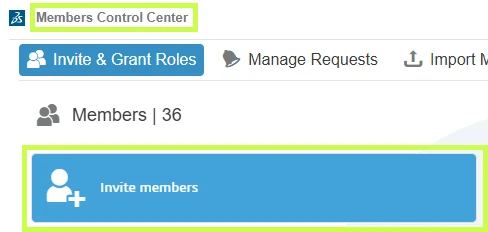
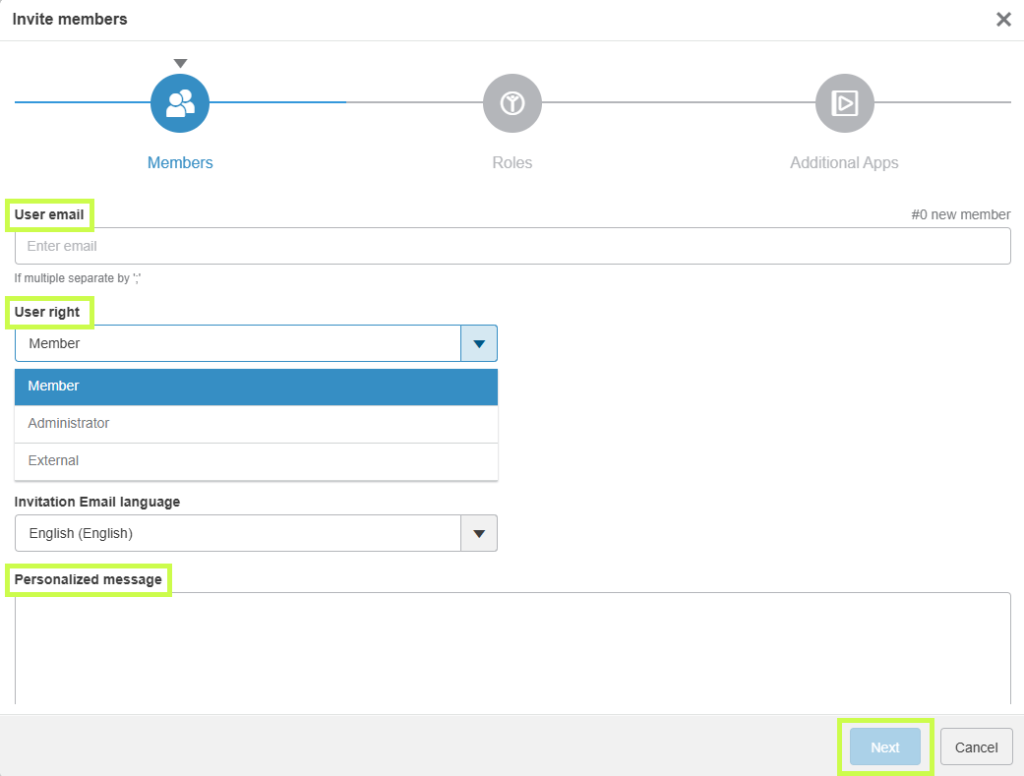
Steps to Invite a Member:
1. Click Invite Member
2. Enter one or more email addresses
3. Choose user rights:
- Member
- Tenant Administrator (always a good idea to have a backup admin)
- External User
4. Optionally include a personal message
5. Click Next to select Roles
Choose the Roles to assign, review any prerequisite requirements, and configure licensing options if needed.
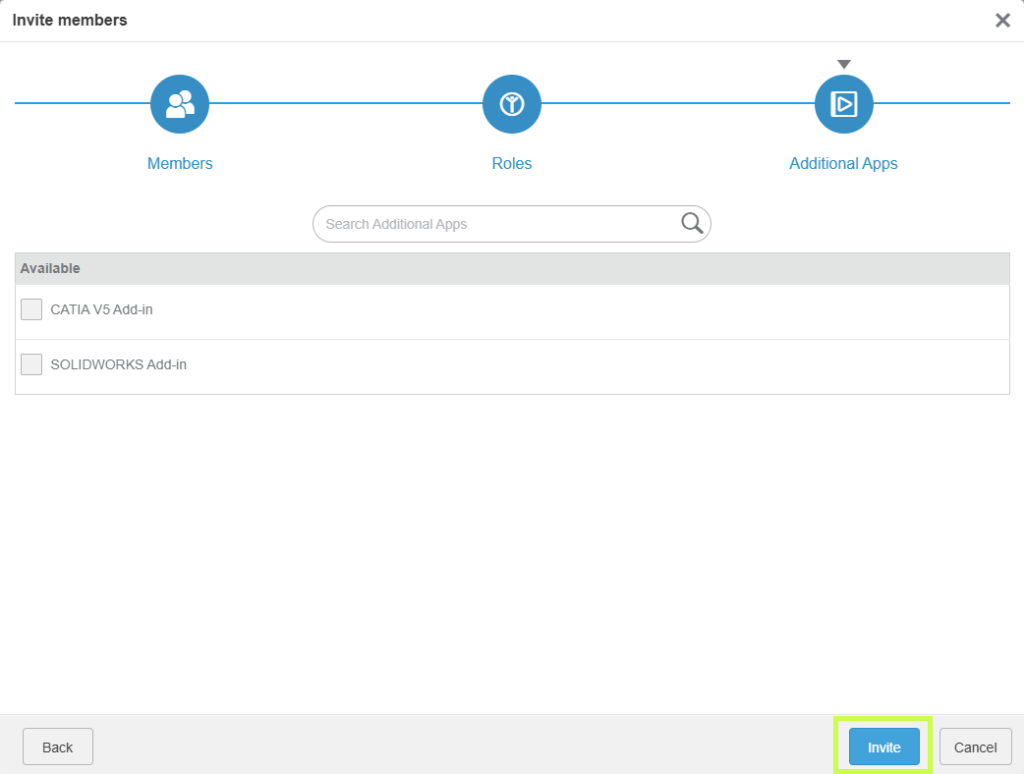
In the final step, select any available apps and click Invite to complete the process.
Requesting Roles (User-Initiated)
Users can also request Roles directly from the platform:
1. Open the Compass
2. Go to Company
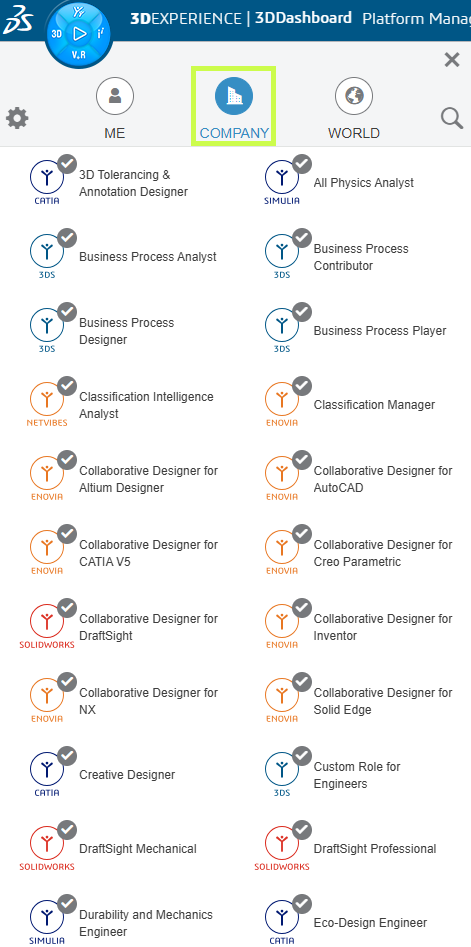
3. Select a Role and click Request

The administrator will receive both a platform notification and an email.
Approving Role Requests:
1. Open the Members Control Center
2. Select Manage Requests
3. Open the request tile
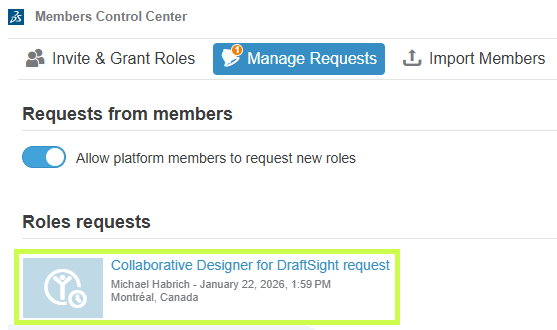
4. Click Accept to grant the Role

Assigning Roles Using Groups
Groups are a powerful way to manage Roles at scale.
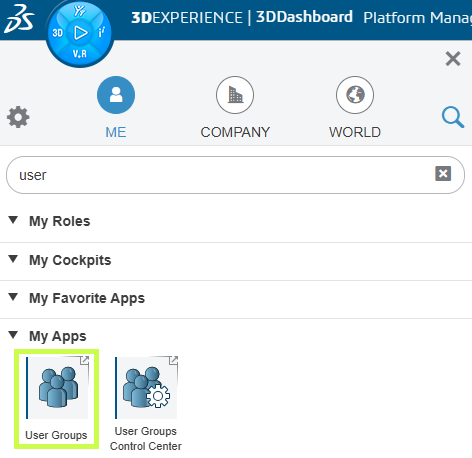
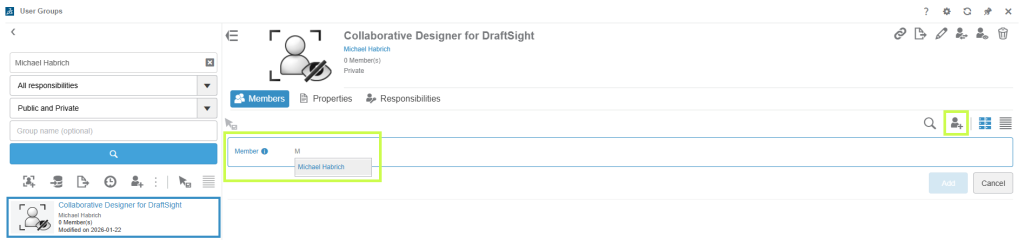
Creating a User Group:
1. Open the User Groups app (via the Compass)
2. Click Create Group

3. Enter a name and description
- Tip: name the group after the Role it will receive

4. Click Create
5. Add members to the group and save
Assigning Roles to a Group:
1. Go to Members Control Center → Invite & Grant Roles
2. Open Details for the desired Role
3. Switch to the Groups tab
4. Select the appropriate group and confirm any prerequisite Roles

Any user added to the group will automatically receive the assigned Role.
Removing Members from the Tenant
When a user no longer needs access:
1. Open the Members Control Center
2. Select Details for the member
3. Go to Settings
4. Remove the user from the tenant
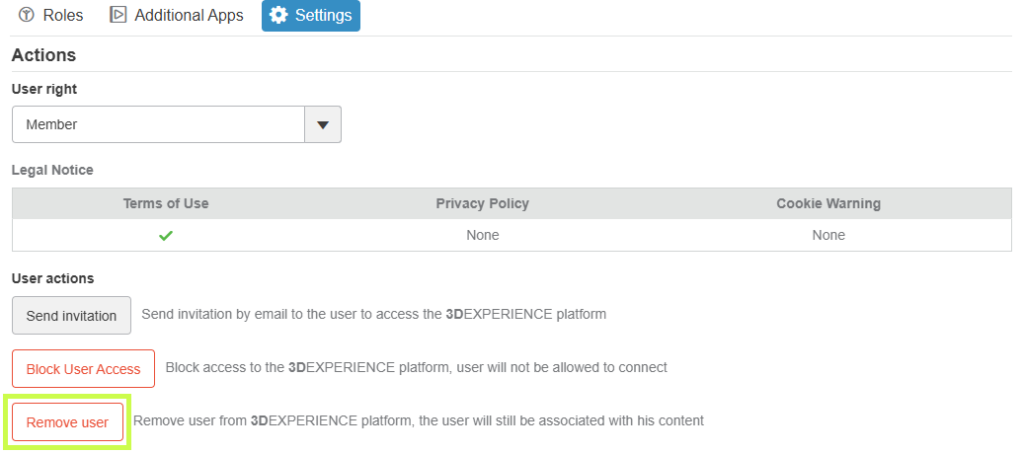
![]() Make sure to remove any roles that have been assigned to that user before removing them from the platform to avoid any issues with future re-assignment.
Make sure to remove any roles that have been assigned to that user before removing them from the platform to avoid any issues with future re-assignment.
![]() The best practice is to use User Groups to assign roles, that way you can simply remove a user from the User Group to remove their roles.
The best practice is to use User Groups to assign roles, that way you can simply remove a user from the User Group to remove their roles.
Final Thoughts
Managing Roles effectively is key to getting the most value from the 3DEXPERIENCE platform. With the right setup, you can ensure users have exactly the tools they need no more, no less while keeping licensing clean and manageable.
Looking to go further?
-
Check out more tips and tutorials on our YouTube channel.
-
Explore best practices with our experts.
-
Or reach out to our team, we’re here to help you get the most out of your platform.
Your platform should work the way your team works and we’re here to help make that happen.